(916) 308-3856

📌Key Takeaways
Protect your high-pressure misting investment with a 15-minute winterization process that prevents thousands in freeze damage.
-
Drain From Pump Outward: Disconnecting the high-pressure outlet and using the drain fitting clears trapped water before it freezes and cracks components.
-
Indoor Storage is Non-Negotiable:Moving the pump to heated space eliminates freeze risk that warranty explicitly excludes from coverage.
-
Remove All Nozzles: Storing nozzles separately in a labeled bag prevents cracking from residual water expansion inside small orifices.
-
Empty the Filter Completely: Opening the filter valve drains hidden water pockets that commonly cause bowl cracks during hard freezes.
-
Spring Restart Takes Minutes:Reconnecting lines, flushing air, and checking filters brings the system back online without costly repairs or delays.
Fifteen minutes now = no emergency pump replacement later.
Greenhouse operators and nursery managers protecting high-pressure misting equipment will gain a clear protection strategy here, preparing them for the detailed winterization checklist that follows.
"A frozen pump is a broken pump; winterization is non-negotiable for longevity."
Picture this scenario:You've invested in a quality misting system that kept your greenhouse comfortable all summer. The first hard freeze rolls through overnight. By morning, the water trapped in your lines has expanded, cracking seals and splitting fittings. For a 1000-PSI misting pump, that usually means destroyed seals, split housings, and a surprise replacement bill in spring.
This guide walks you through the complete winterization process for high-pressure misting systems. In about 15 to 20 minutes, you can protect your equipment, preserve your warranty coverage, and ensure everything fires up smoothly come spring.
What Winterization Actually Means for High-Pressure Systems
Winterization removes all water from three critical areas: your high-pressure lines, your filter housing, and your pump. Then you store the pump indoors where freezing temperatures can't reach it.
Think of it like parking a combine or tractor for winter: fluids out, components protected, so equipment is ready to go when you are. Water expands when it freezes, roughly 9% by volume. In a closed system running at approximately 1000 PSI, that expansion has nowhere to go. Something has to give, and it's usually your most expensive components.
The process takes less time than brewing a pot of coffee. You'll need your drain fitting (included with your system), a towel, and a storage bag for your nozzles. If you have access to an air compressor, that helps but isn't required.
Here's what you'll accomplish: complete drainage of all lines, proper filter maintenance, and safe indoor storage of your pump until warmer weather returns.
Gather Your Tools and Check Your Setup
Before disconnecting anything, take a moment to prepare.
Locate your drain fitting. This small brass piece came with your original system and threads into the high-pressure line fitting. If you've misplaced yours, replacements are available through Smart Mist USA's fittings collection.
Grab a towel or small bucket. Some water will drain out, and containing it makes cleanup easier. You'll also want a resealable plastic bag for storing nozzles over the winter.
Check your pump's current location. Is it in a spot protected from sun and rain with good ventilation? A nearby shed, under a cabinet, or in a garage all work well. The pump should never be installed inside living areas. If your current setup leaves the pump exposed, note this for later—winterization is the perfect time to plan a pump enclosure or better placement before next season.
One more thing: verify you know where your filter's drain valve is located. On the clear bulb-style filter included with most systems, it's at the bottom of the housing.
The 5-Step Winterization Process
These steps follow the exact sequence from the Smart Mist USA User Manual. The order matters because draining from the pump outward ensures no water gets trapped under pressure or behind check valves.

Step 1: Unplug the machine
Safety comes first. Disconnect power completely before touching any fittings or connections. This protects both you and the pump's electronics.
Step 2: Remove the last nozzle in your system
Unscrew the final nozzle at the end of your line. This relieves any remaining pressure and opens an exit point for water to drain. Set the nozzle aside in your storage bag.
Step 3: Disconnect the high-pressure fitting from the pump and insert the drain fitting
The high-pressure outlet is on the left side of the pump (the black tubing connection). Disconnect this fitting and thread in your drain fitting. You should see water begin draining immediately from the open end where you removed the last nozzle. Let it flow until it stops completely.
Step 4: Optional air-assist for thorough drainage
If you have an air compressor available, this step helps clear any remaining water from low spots in your lines. Disconnect the water inlet fitting from the right side of the pump. Using an air gun with a rubber tip, press it firmly against the water fitting opening and give short bursts of air. This pushes remaining water out through your lines. Watch the open end of the high-pressure line for water followed by a steady air-only stream. It's not mandatory, but it provides extra insurance against any trapped pockets of water.
Step 5: Drain the filter and bring the pump indoors
Open the valve at the bottom of your filter bulb to drain it completely. If you have the 10-inch blue canister filters for phosphate or sediment filtration, unscrew the canisters and bring them inside as well. Disconnect any remaining hoses from the machine. Now bring your pump indoors for winter storage.
This sequence works because you're clearing water from the highest-pressure point (the pump) outward through the system. Any water that could potentially freeze and expand gets pushed out before you close things up.
The entire process typically takes 15 to 20 minutes. That small time investment protects equipment that represents a significant investment and avoids the frustration of springtime repairs.
Where to Store Your Pump for Winter
Your pump needs a dry, climate-controlled space through the winter months. A heated garage, basement, or utility room all work well.
Avoid unheated sheds or outbuildings where temperatures might still drop below freezing. The whole point of bringing the pump inside is protecting it from freeze damage. Storing it somewhere that still gets cold defeats the purpose.
Set the pump on a shelf or dry surface. Keep it away from areas where it might get knocked over or where moisture could accumulate. You don't need to do anything special to prepare it, but storing it with the hoses disconnected allows any residual moisture to evaporate.
If you have blue canister filters, check the phosphate level and inspect your sediment filter while everything is apart. This is a good time to order replacement filter cartridges if needed so they're ready for spring startup.
For the nozzles you've removed, store them in a labeled bag somewhere you'll find them easily. One grower from Idaho learned this lesson the hard way: "Before winter last year, I disconnected the pump and blew the system out with air, some water must have remained in the nozzles. Several nozzles cracked from the cold winter and had to be replaced." His solution for the following season was removing all nozzles, putting them in a ziplock bag, and storing them in the garage alongside the pump.
Getting Your System Running Again in Spring
When warmer weather returns, bringing your system back online is straightforward.
Start by inspecting and cleaning your filters. Replace any cartridges that look worn or depleted. If you experienced mineral buildup issues last season, this is the time to add phosphate filtration to your setup.
Reconnect both tubes to your pump. The blue water inlet connects on the right side. The black high-pressure line connects on the left. Make sure fittings seat properly—tubes need a full 2cm of insertion for the locking mechanism to engage correctly.
With the last nozzle still removed from your line, turn on your water supply to approximately one-third flow. Let water run freely for three to four minutes. This flushes the lines and pushes out any air that accumulated over winter.
Turn off the water and screw in your last nozzle. Open the water spigot back to one-third flow, and you're ready to run.
If you notice excessive shaking in the black high-pressure tube after startup, air remains in the pump. Disconnect the black tube briefly and let water run through the pump to purge it. Reconnect and test again.
Check your pressure gauge monthly during the operating season as part of regular maintenance. Inspect nozzles for any cracking or damage from storage and replace any that look compromised.
Check your pressure gauge monthly during the operating season as part of regular maintenance. Inspect nozzles for any cracking or damage from storage and replace any that look compromised.
Troubleshooting Common Winterization Issues

Sometimes water doesn't drain completely on the first pass. If you reconnect things in spring and find evidence of freezing, here's how to diagnose and address common problems.
Lines still dripping air and water after draining: Reopen your filter bowl valve and repeat the blow-out process with compressed air if available. Look for dips or low spots in your line routing where water could collect. These are common culprits for trapped moisture.
Calcified or clogged nozzles: Mineral buildup happens, especially in hard water areas. Use CLR or a similar calcium-dissolving product to clean affected nozzles. Vinegar isn't strong enough for serious calcium deposits. If you're dealing with ongoing hard water issues, adding a phosphate filter to your system prevents calcium from reaching your nozzles and causing pump damage. Hard water damage isn't covered under warranty, so prevention matters.
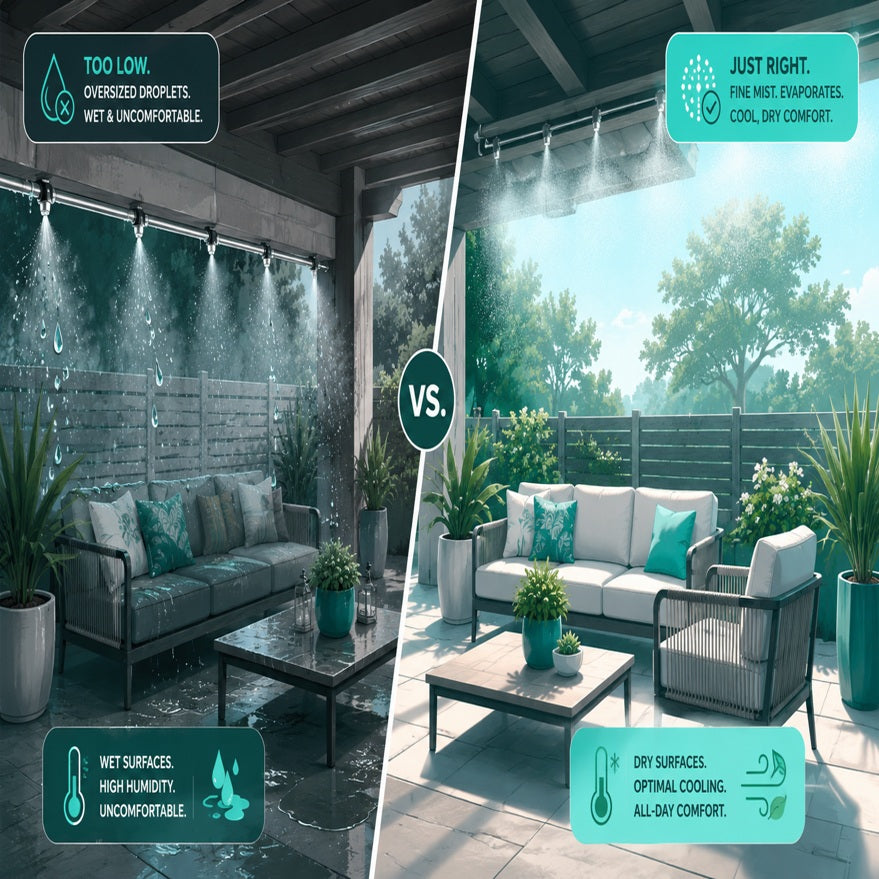
Wetting issues when you restart: If your misting system creates wet surfaces rather than fine cooling mist, the cause is usually one of four things: temperatures are too low or humidity is too high for efficient evaporation, your fan is mounted too low (recommended mounting height is around 10 feet), your nozzle size is too large for your environment, or the number or size of nozzles is too large for the pump resulting in low pressure. Review the nozzle sizing chart to verify your configuration.
Why This Matters for Your Investment
Freeze damage falls outside warranty coverage. Smart Mist USA's warranty explicitly excludes "damage caused by leaving the pump out in freezing temperatures, or damage to tubes, fittings, or nozzles due to freezing water." The warranty also notes to "remove nozzles to prevent implosion due to expanding residual water."
Proper winterization protects both your equipment and your coverage. A pump replacement costs significantly more than the 15 minutes this process requires.
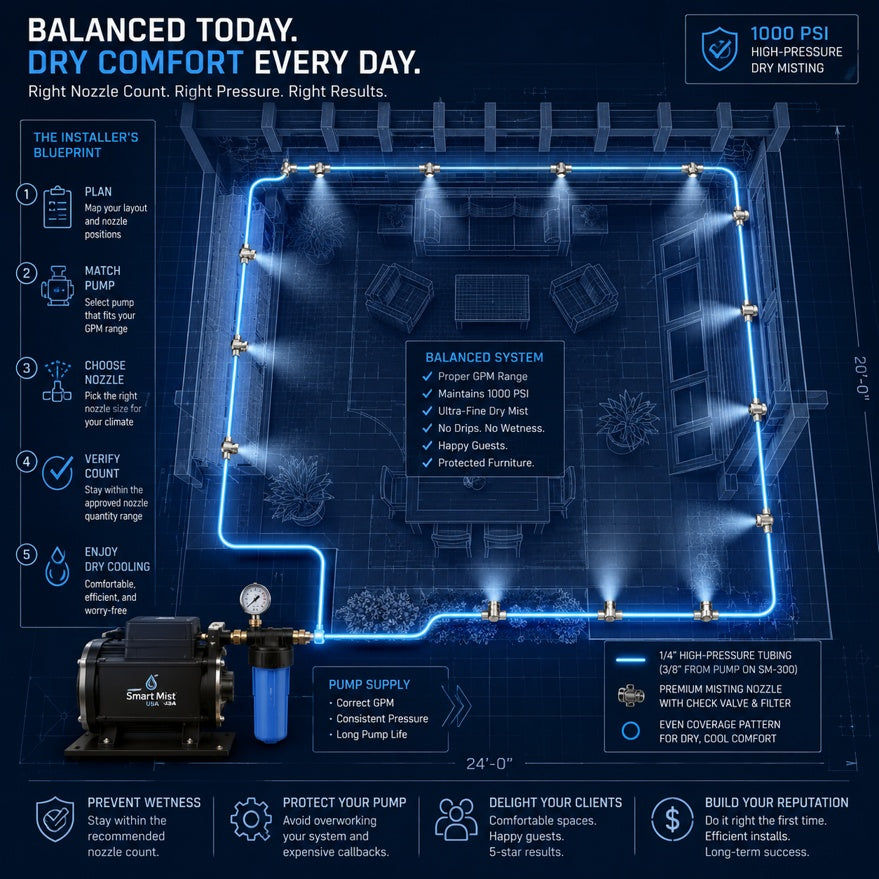
High-pressure misting systems represent a different category than standard low-pressure garden misters. Operating at approximately 1000 PSI, these systems create ultra-fine droplets that flash-evaporate for effective cooling without wetting. That precision engineering also means the components have tighter tolerances with less room for the kind of abuse that freezing causes.
Your system consists of three main components: the fan unit, the external high-pressure pump, and the high-pressure line connecting them. The pump is the heart of the operation and the most critical piece to protect. Lines and fittings can be replaced individually if damaged, but a compromised pump means the whole system is down until repairs are complete.
Quick-Reference Winterization Checklist
Drain
-
[ ] Unplug machine completely
-
[ ] Remove last nozzle from line
-
[ ] Disconnect high-pressure fitting (left side of pump)
-
[ ] Insert drain fitting and verify water flows out
-
[ ] Optional: Use air gun at water inlet to blow out lines
Disconnect
-
[ ] Open filter valve to drain bulb
-
[ ] Remove blue canister filters if applicable
-
[ ] Disconnect all hoses from pump
-
[ ] Store nozzles in labeled bag
Store
-
[ ] Bring pump to heated indoor location
-
[ ] Place on dry shelf or surface
-
[ ] Check phosphate and sediment filter condition
-
[ ] Order replacement filters if needed
Related Resources
For more guidance on maintaining your high-pressure misting system, these resources provide additional context:
-
Installation Guide covers pump placement, ventilation requirements, and GFI protection
-
Frequently Asked Questions includes the complete winterization procedure and air-assist tip
Ready to get your system set up for easier maintenance next season? Explore pump enclosures for weather protection, or browse filtration upgrades if hard water has been an issue.
Have questions about your specific setup? Schedule a free phone consultation with Jeff to talk through your winterization plan or any other system questions.
About the Smart Mist USA Insights Team
The Smart Mist USA Insights Team is our dedicated engine for synthesizing complex topics into clear, helpful guides. While our content is thoroughly reviewed for clarity and accuracy, it is for informational purposes and should not replace professional advice.
Disclaimer:This guide is intended as a comprehensive starting point. For decisions specific to your unique situation, we always recommend consulting a qualified professional.