

 Free Shipping On All Orders Over $50
 (916) 308-3856


The best misting system with the best customer service. Jeff has been great!
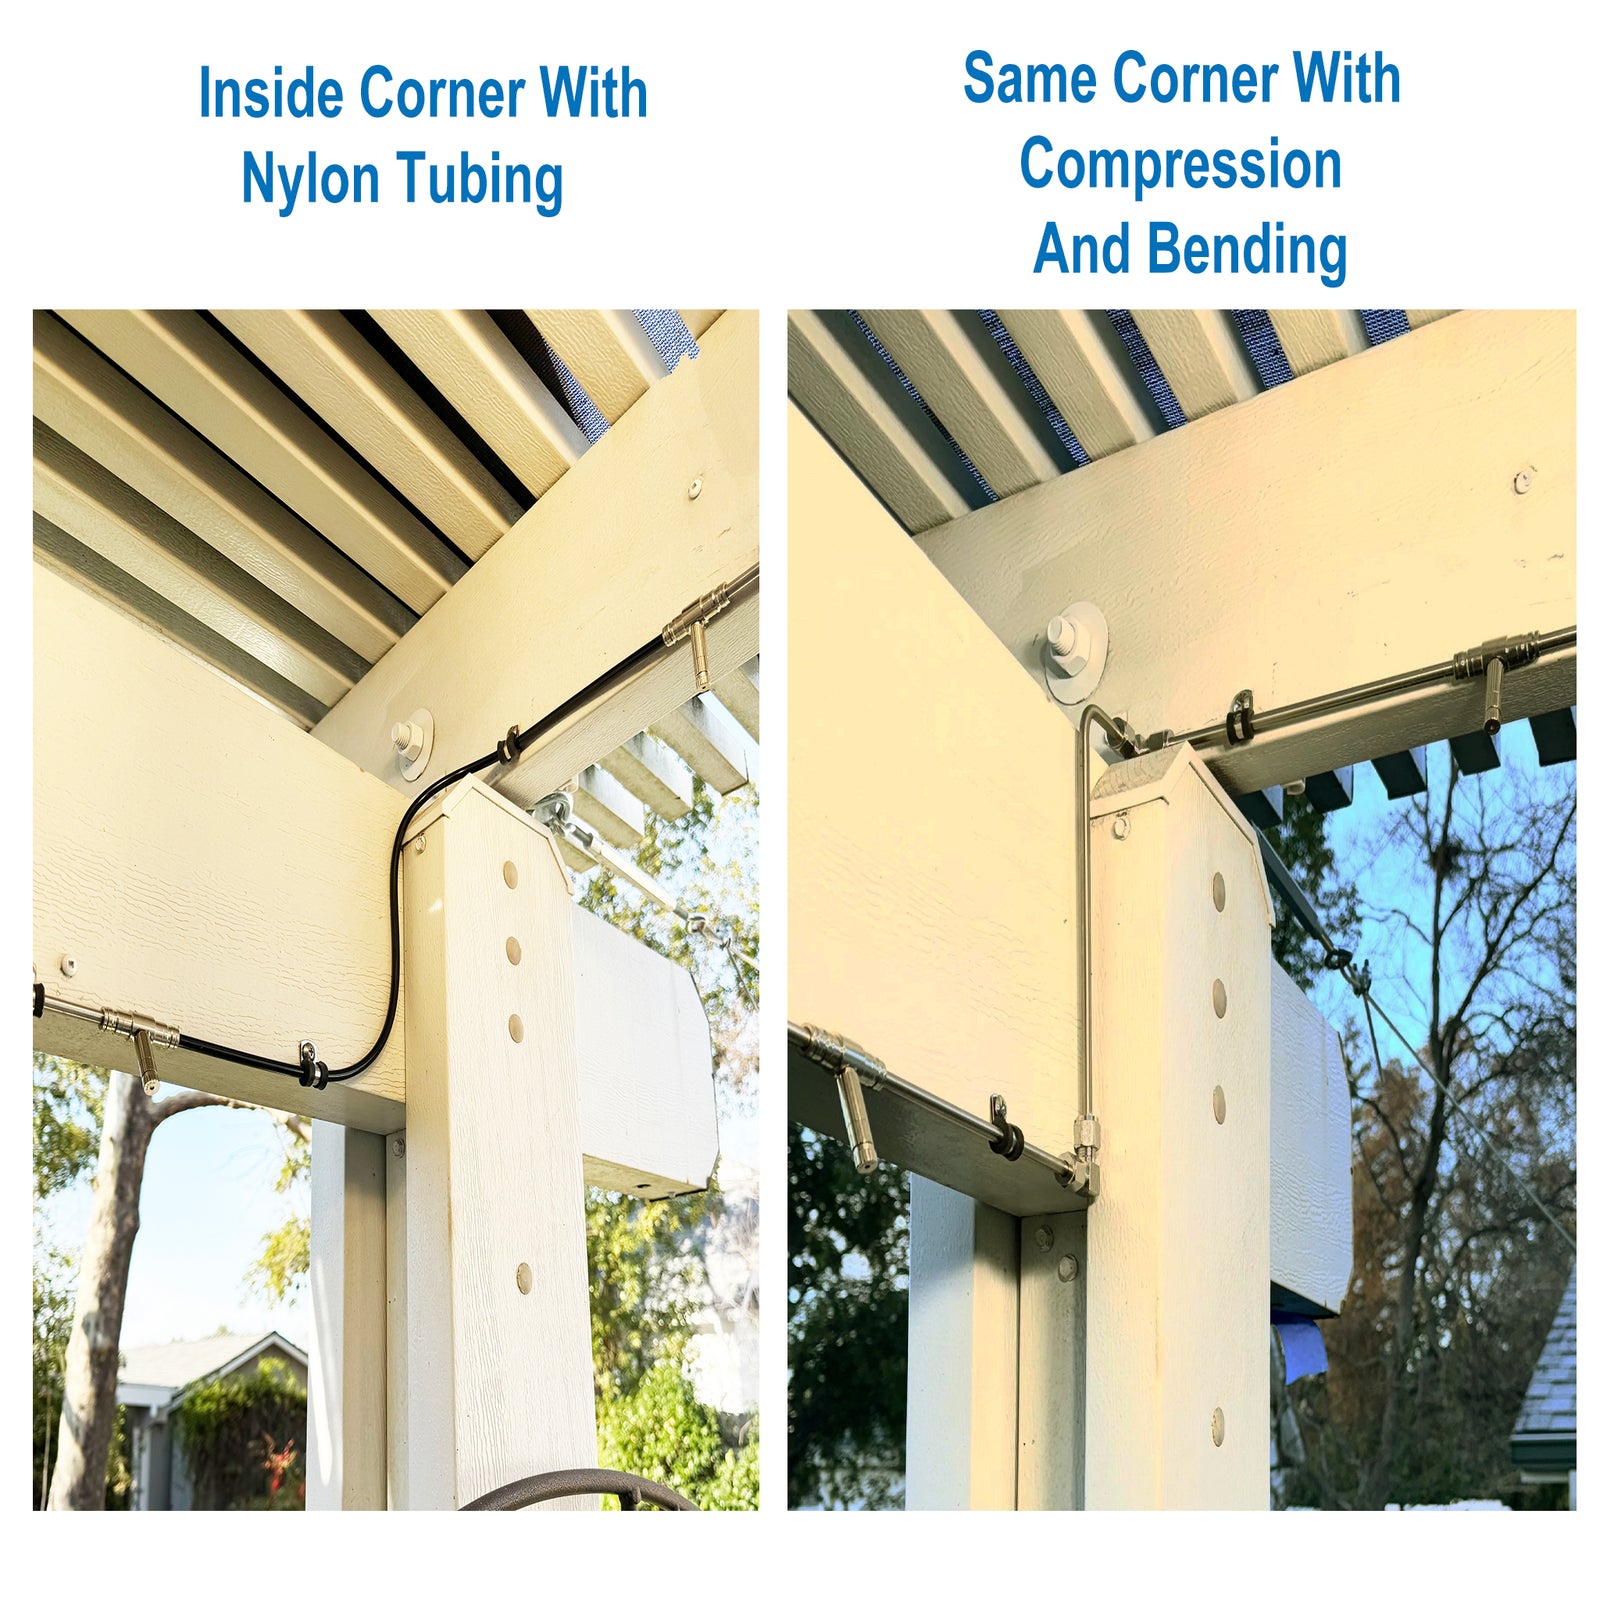
The stainless is a great way to go in those areas where the tubing is exposed. It doesn't bow due to temperature change like the nylon tubing.
Great service from Jeff. System works as advertised and was easy to install. I own a wedding venue in Texas and on late notice Jeff was able to overnight me the last parts i needed to complete about 150 feet of misting system for two covered patios. Received all the parts the day before a mid-July wedding and was able to install and test on my own and misting system worked like a champ that day. The bride was super excited and it absolutely helped to mitigate the 100 plus temps here. Been working great for the past 2-1/2 months. Looks like just periodic maintenance to clean the mister tip filters as we have really hard water here.
Jeff went above and beyond to help me solve a problem. Always picks up the phone or calls right back. Very knowledgeable. Fell like any other company would have left me hanging. Really nice
I have a huge patio area that needed some help due to the gnats and mosquitos and the hot weather. I installed the Smart Mist system in one day. I live in an area that gets well over 100 every day in the summer. I ordered the .08 nozzles. This system works great at cooling and it blocks those stupid insects. I've communicated with Jeff a couple of times for a few extra parts. He sent my orders the same day both times.